How to Use Barcodes with Orkiosk Kiosks
A step-by-step guide to generating and using barcodes for products scanned by Orkiosk self-service kiosks.
At Orkiosk, we enable fast, frictionless purchasing experiences through intelligent self-service kiosks. One of the most effective ways to speed up the buying process is using barcodes on self-service kiosks, allowing customers to scan products and complete payment in seconds.
Step 1: Enter the following link https://orkiosk.com/en/barcode Enter the text or number you want to encode in the barcode generator. This can be a product SKU, internal identifier, or POS-linked code.
Step 2: Select the appropriate barcode format for your operation, such as CODE 128, EAN, or UPC, ensuring compatibility with Orkiosk kiosks.
Step 3: Preview the barcode in real time to confirm accuracy before use.
Step 4: Click “Download” to save the barcode as a PNG file, ready to be used in product images or labels.
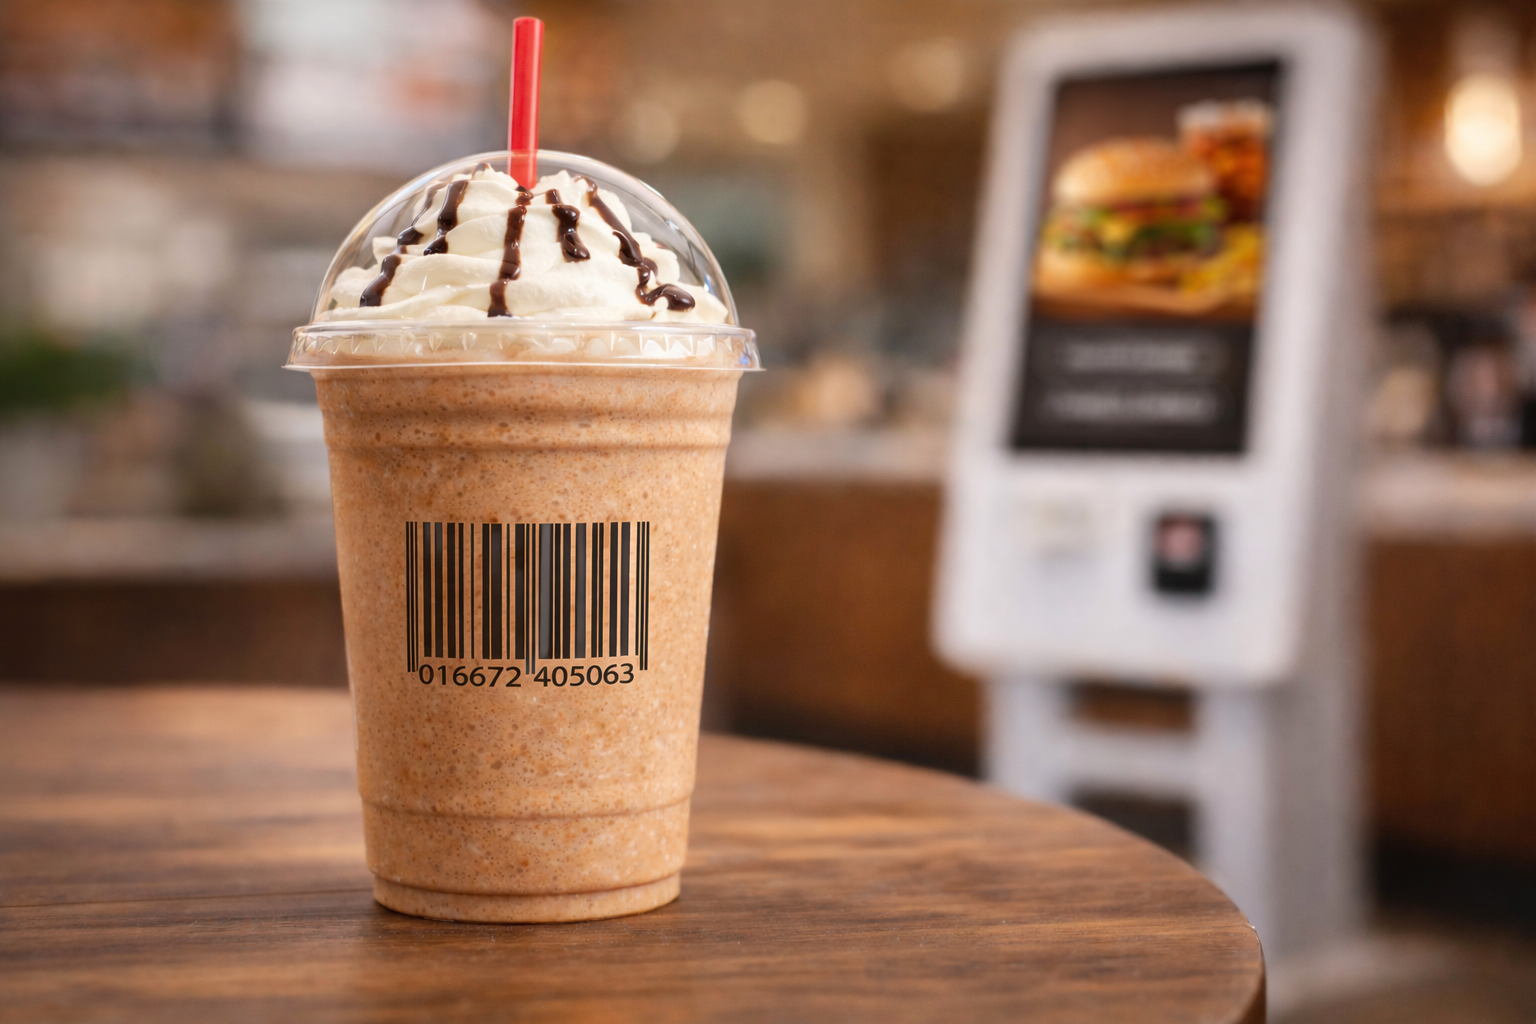
Step 5: Add the barcode to the product artwork or image, making sure it’s clear, readable, and well-contrasted.
Step 6: Publish the product image with the barcode on social media, digital menus, or promotional materials.
Step 7: Customers can go directly to the kiosk, scan the barcode, and instantly see the product loaded on the screen.
Step 8: The customer confirms the order, pays, and completes the purchase in seconds—no lines, no friction.
This strategy is highly effective for featured products, promotions, grab-and-go items, and digital campaigns, driving faster conversions.
Conclusion: Using barcodes integrated with Orkiosk kiosks turns purchasing into a fast, intuitive, modern experience.
Explore more guides and solutions from Orkiosk to optimize your operation and take self-service to the next level.
Did you like this article? Share it with others
Recommended posts
Self-Service Technology
Customer experience begins at the kiosk
How self-service kiosks improve the customer experience from the very first interaction in modern restaurants.
Trends & Innovation
How AI Transforms the Restaurant Experience
Artificial intelligence is revolutionizing the restaurant industry. Discover how Orkiosk integrates AI into its solutions to improve efficiency, personalize experiences, and increase profitability.
Business Optimization & Growth
Frictionless restaurant productivity
How to improve throughput by removing friction with self-service, digital payments, and automation inside the Orkiosk ecosystem.